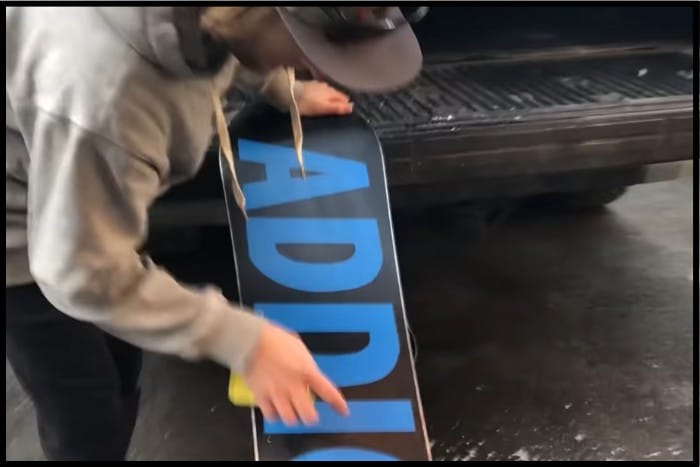
Snowboarding can be exhilarating and fun, but it’s also a sport that can subject your expensive gear to wear and tear. One of the most common issues snowboarders face is scratches on the base of their snowboards. These scratches can affect your ride’s smoothness and overall performance.
You can fix snowboard scratches by assessing damage, cleaning the base, dripping in P-Tex, scraping off excess material, buffing the area, and waxing. You’ll also keep your board in top condition for your next ride down the slopes, resulting in a safer and more enjoyable snowboarding experience.
In this article, we’ll walk you through a step-by-step guide on how to fix snowboard scratches, ensuring your board stays in top condition for your next ride down the slopes. I also have DIY guides on fixing snowboard chips, fixing snowboard boots, and fixing snowboard bindings in case you need help with those!
How to Prep Your Workspace?
Creating a proper workspace for snowboard repairs is crucial to the repair process. Not only does it ensure your safety, but it also impacts the effectiveness of your repairs.
1. Clear the Area
Remove any clutter or unnecessary items from your workspace to ensure you have enough room to maneuver and work on your snowboard.
This will also help reduce the risk of accidents or damage to other items in the area. Clean away any dust, as you don’t want this getting into your repair or wax job.

2. Set Up Adequate Lighting
Make sure your workspace is well-lit to facilitate the accurate assessment of damages and the precise application of repairs.
Consider using portable or adjustable lights to focus on specific areas of your snowboard as needed.
3. Organize Your Tools and Supplies
Keep your tools and supplies within easy reach by organizing them on a nearby table or workbench. This will help streamline your repair process and prevent unnecessary distractions or interruptions.
5. Protect Your Work Surface
To avoid damaging your work surface, place a protective layer beneath your snowboard, such as a rubber mat or old towel.
This will also help prevent your board from slipping or scratching the surface while you work.
6. Ventilation
Ensure the area is well-ventilated to avoid inhaling fumes from P-Tex, wax, or other chemicals used during the repair process. Open windows or use fans to maintain proper airflow.
Steps to Fix Snowboard Scratches
Step 1: Gather Your Supplies
To fix the scratches on your snowboard, you’ll need the following supplies:
A Clean Cloth
A lint-free cloth used for wiping away dirt, grime, and excess liquids from the snowboard base, ensuring a clean surface for repairs.
Rubbing Alcohol or Base Cleaner
A cleaning solution designed to remove dirt, wax, and other contaminants from the snowboard base, prepping it for repair or waxing.
P-Tex Repair Candles
Small sticks made from the same material as snowboard bases, designed to melt and fill scratches or gouges, restoring the base’s smoothness.
A Metal Scraper
A thin, flat, and sturdy tool used for removing excess P-Tex material after repairs or excess wax after waxing, ensuring a flush and even surface.
A Lighter or Propane Torch
A heat source used to melt the P-Tex repair candles, allowing the material to be applied to the damaged area of the snowboard base.
A Base Brush or Scotch-Brite Pad
A tool used for buffing and smoothing the repaired area of the snowboard base or for polishing the base after waxing, providing a fast gliding surface.
Wax
A specially formulated substance applied to the snowboard base to enhance glide and protect the base from abrasion and damage, available in various temperature-specific formulations.
A Waxing Iron
A specific type of iron designed to heat and melt snowboard wax, allowing for even distribution and absorption of wax on the snowboard base.
A Wax Scraper
A sturdy plastic or metal tool designed to remove excess wax from the snowboard base after waxing, ensuring optimal glide and performance on the slopes.
Step 2: Assess the Damage
Before you begin repairing the scratches, evaluate the severity of the damage. Minor scratches can be filled with P-Tex and wax, while deeper gouges may require professional repair.
If you’re unsure whether you can fix the scratch yourself, consult a snowboard technician at your local shop.
Step 3: Clean the Base
Using a clean cloth, apply rubbing alcohol or base cleaner to the affected area. This will help remove any dirt, grime, or old wax from the scratch.
Allow the base to dry completely before moving on to the next step.
Step 4: Light the P-Tex Candle
Hold the P-Tex candle in one hand and the lighter or propane torch in the other. Light the end of the P-Tex candle and wait for it to start melting.
Hold the candle at a slight angle, allowing the flame to heat the P-Tex without directly touching it. This will prevent carbon build-up and ensure a smooth repair.
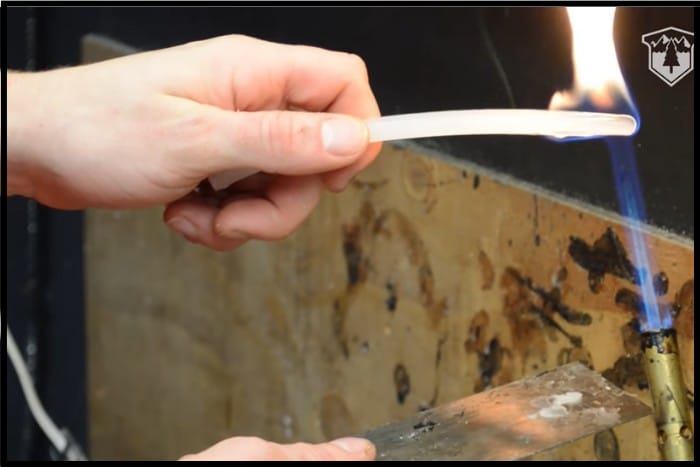
Step 5: Drip P-Tex into the Scratch
Once the P-Tex is melting, carefully drip it into the scratch. Start at one end of the scratch and slowly move to the other end, ensuring you fill the entire scratch with melted P-Tex.
Apply enough P-Tex to slightly overfill the scratch, as you’ll be scraping off excess material later.
Step 6: Allow the P-Tex to Harden
Let the P-Tex cool and harden for at least 20-30 minutes. The longer you wait, the easier it will be to scrape off the excess.
Step 7: Scrape Off Excess P-Tex
Using a metal scraper, gently remove the excess P-Tex from the base of your snowboard. Hold the scraper at a slight angle and make long, even strokes along the entire length of the scratch.
Be careful not to dig into the surrounding base material. Keep scraping until the repaired area is flush with the rest of the base.
Step 8: Buff the Repaired Area
Use a base brush or Scotch-Brite pad to buff the repaired area. This will help smooth out any remaining inconsistencies and blend the repair with the rest of the base.
Step 9: Wax Your Snowboard
Now that you’ve fixed the scratch, it’s time to wax your snowboard. Apply a layer of wax appropriate for the snow conditions to the entire base of your board.
Use a waxing iron to melt the wax, spreading it evenly across the base. Allow the wax to cool and harden for at least 20-30 minutes.
Step 10: Scrape Off Excess Wax
Using a wax scraper, remove any excess wax from your snowboard’s base. Hold the scraper at a slight angle and make long, even strokes from tip to tail.
Be sure to remove all excess wax to ensure a smooth, even finish.
Step 11: Buff the Base
After scraping off the excess wax, use a base brush or Scotch-Brite pad to buff the base, which will create a smoother and faster gliding surface.
Brush from tip to tail, applying consistent pressure as you move along the length of the board.
Summary
By following these steps, you can effectively repair minor scratches on your snowboard and keep it in optimal condition for your next ride.
Regular maintenance, including cleaning, repairing, and waxing, will help prolong the life of your snowboard and ensure you enjoy a smooth, high-performance ride every time you hit the slopes.
Remember to assess the severity of any damage to your board and consult with a professional technician if you’re unsure about the best course of action.