So you got a chip in your snowboard, and you’re panicking about what to do. You’re left wondering if this is the end of your snowboard’s life.
Snowboard chips can be repaired and can be done yourself at home. You can repair chips yourself using either epoxy or a repair candle. If it’s a major chip, your board can be taken to a snowboard repair shop to get fixed. Similar methods can also be used to repair a crack.
It isn’t the end of the world to get a chip in your snowboard, and it can be repaired relatively easily, depending on how extensive the damage is.
How To Repair a Snowboard Chip Or Crack Yourself?
There are multiple ways that you can repair a snowboard chip yourself. There’s a method for minor damages to the top sheet located on the very top of your board.
And another technique for damages that are deeper or occur on the base of your board.
Note that both of these methods only apply to small chips on your board, no more than an inch or two in diameter.
They do not apply to any repairs more extensive than that. A chip in your snowboard isn’t the only issue you could encounter.
You could also get a crack in your snowboard and wonder how to fix it. The methods that exist to clean it are the same as listed below.
If you need a cheaper option, use the epoxy method listed below. If you’re willing to go the more expensive route, buy a repair candle like P-Tex.
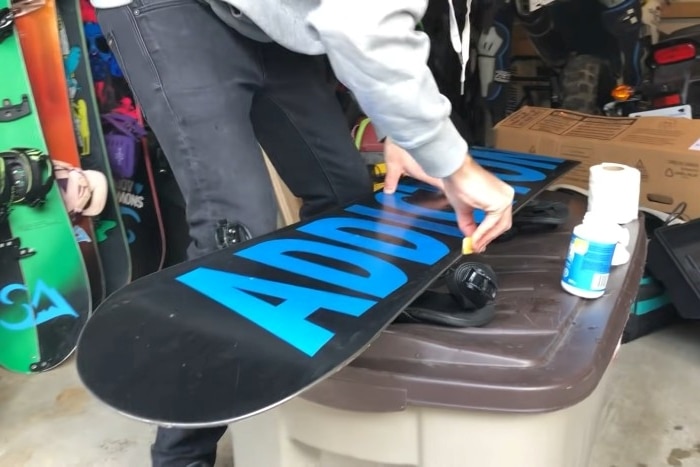
1. The Clamping Method
The simple repair is to go to your local hardware store and purchase a clamp and some waterproof epoxy, with the optional addition of a small sheet of metal plastic.
You’ll want the epoxy to be strong enough to withstand colder temperatures, as that’s where your snowboard will spend the bulk of its time.
First, you’ll want to wait a few days after your last snowboarding trip to let any excess moisture evaporate from the affected area.
Next, clean off the snowboard using Windex or another multi-surface cleaner, removing excess dirt.
Next, apply the epoxy to the damaged area, making sure that enough gets on and around the chip to allow it to be adequately sealed.
Then, use the clamp to hold the chipped material down in place and let it sit for a few days to let the epoxy dry before hitting the slopes. You should see results fairly quickly.
Alternatively, you can also epoxy a small sheet of metal or plastic to the affected area, which will provide the board with additional support.
This step is not necessary to provide a complete repair of the board but can be used as an extra measure to fortify your board.
This method is only effective for repairs that can be clamped down on the board’s top sheet.
It does not help for repairs that need to go deeper than the top sheet or those which cannot be clamped down.

2. The P-Tex Method
The P-Tex method is more exhaustive but is effective for damages that penetrate deep into the board.
You will need to purchase a repair candle like P-Tex, a blowtorch or lighter, and a metal scraper to fix these damages.
Note that this method involves using a live flame, so if you’re not comfortable with that, you should stick with the cheaper method or visit your local board store for help.
Before doing this method, you’ll want to clean your board and then let the board sit out for a few days to dry out completely.
Once that is done, lay your board out on a flat surface and then ignite the repair candle or P-Tex with the blowtorch or lighter.
You’ll want to hold the candle towards the board’s base directly above the afflicted area of the snowboard and wait for the P-Tex or candle to start dripping.
Let the drips fall into the damaged area until it’s covered, leaving slightly more on top to scrape off later. This will then seal the area.
After this, you’ll want to take your metal scraper and go against the grain of the snowboard, scraping away the excess material.
This will allow for an even surface on the base of the board.
Lastly, you’ll want to let the board settle for a few days after the repairs to ensure that the P-Tex has time to set so no moisture can get into the board’s core.
Finding a Snowboard Repair Shop
If there’s a significant chip or crack in your board, you will want to find a snowboard repair shop to do the job for you.
They have specialized equipment to repair all common issues, ensuring your board stays on the mountain longer.
They also have a specialized epoxy that can be used to attach new materials to the board for extensive repairs.
To find a snowboard repair shop, ask around your local snowboarding community for any recommendations on which is the best one near you.
In general, you can have good luck finding places using the internet, and trusted review sites like Yelp should be able to help you see which ones are quality and which ones you’re better off avoiding.
Preventing Any Further Damage To Your Board
The best way to repair any damage to your snowboard is never to have it get damaged.
Prevention is your best friend when it comes to this, as there are a few things you can do in both how you ride and how you choose to maintain your board that can make your life a lot easier down the line.
Of course, mistakes do happen, and sometimes there isn’t anything you can do to avoid damage to your board.
If this does happen, don’t be too hard on yourself. Know that it’s okay to make a few mistakes and that a damaged board isn’t the end of the world.
1. Failing To Repair a Chipped Board
Failing to repair a chip in your board can have large consequences.
While it may seem fine in the short term to let it sit on its own, in the long term, you can destroy your board if you fail to repair a chip.
Chips allow moisture to seep into the board, which can destroy the board by corroding its internal components, causing it to degrade gradually over time.
If you have a chip or crack in your board, it’s best to repair them as soon as possible.
2. Avoiding The Park
If you’re looking to keep your board in pristine condition, you should steer clear of the terrain park, as there are a lot of objects there that can damage a board easily.
The more intense or rigorous activities you do to your board, the more likely it will get damaged over time, and hitting jumps, rails, and boxes are the easiest way to put undue stress on your board.
In addition, be mindful of how much pressure you’re putting on the board.
The more weight and pressure you put on your board, the more likely it is to incur damage.
Additionally, you can help preserve your board by learning to land on it correctly, as this helps prevent damage.
If you land on the tail or nose of the board, you’re likely to cause damage to it as opposed to if you landed towards the center.
You want to ensure that you’re staying in control of your board in the park if you want to keep your board in top condition.
3. Avoiding Rocks and Ice
Another thing that you’ll want to be aware of is whether or not you’re hitting rocks and ice with your snowboard.
Snowboards are designed to tolerate snow and only that.
While you can learn to handle rough terrain better, it’s not going to be good for your snowboard and can cause it to become more damaged over time.
Try to avoid any rough patches of land that you see when shredding, or if you can’t avoid them, try to minimize the amount of time you spend on them, or else your snowboard may pay the price.
4. Avoiding Riding With an Exposed Core
If your snowboard’s been damaged before, then chances are it’ll get damaged again. You should keep this in mind when riding.
If the core of your snowboard has been exposed when you’re riding, you run the risk of completely ruining your board, as it is exposed to all the elements.
Your snowboard’s core is the foundation of your board, as it has the important job of maintaining the internal structure of your entire board.
It’s designed to be protected by the outer layers of the board. If it gets damaged, you run the risk of breaking your board entirely.
If your core becomes exposed, you’ll want to use a waterproof sealant to protect it from snow, dirt, or ice.
How To Maintain Your Snowboard?
An essential part of keeping your snowboard safe from damage is learning to maintain your board correctly.
While riding your board with its safety in mind is crucial, knowing how to take care of your board is important to ensure that your ride is kept safe for many winters to come.
1. Cleaning Your Board
One of the most crucial mistakes you can make, especially when learning to snowboard, is to not clean off your board before and after snowboarding sessions.
Riding around the mountain, your board will likely accrue a lot of dirt and grime.
This can cause long-term damage to the board, as it may make its way into any cracks and eventually erode the board’s core, causing permanent damage.
To clean your snowboard, it’s best to use a specialized base cleaner. This will ensure your board’s health is kept in top condition.
2. Smooth Away Any Small Scuffs
Another effective way to maintain your board is to smooth out any minor scuffs or scratches that might appear.
It’s common for your board to acquire many little scuffs on its base from riding on rough terrain.
While these aren’t concerning on their own, they can lead to more significant issues if left untreated over time.
The best way to attack these scuffs is to get a stiff brush, like the one you’d clean a bathroom with, and some base cleaner.
Apply a small amount of base cleaner to the base of the board and then work it in with the brush in a circular motion until the base absorbs the cleaner.
3. Repair Your Snowboard’s Edges
Your snowboard edges can degrade over time and often need to be resharpened to function at their best.
A sharper snowboard will be able to pierce through the snow with ease and push through rough terrain in a breeze.
It’s essential to prevent damage, as a dull snowboard can get more easily whittled away at and beaten up by the harsh elements.
While you can go to a snowboard repair shop and have them repair your snowboard for you, you can also do it yourself using a gummy stone and a diamond stone.
A gummy stone is a device used to remove small burrs that occur after sharpening, and a diamond stone is a device used to sharpen the edges of a snowboard.
4. Waxing Your Board
When buying a brand new snowboard, it will come with a fresh coat of wax, ready for you to hit the mountain.
However, after using it a fair bit, you’ll find that this coat of wax will erode, which, if left untreated, can cause your board to be more susceptible to damage.
A phenomenal way to prevent further damage to your board is to wax it.
The wax works to protect your board with an additional thin layer, which helps to protect it from physical damage such as chips, which enables it to last longer.
It also helps preserve the snowboard from moisture that can erode the board internally, causing long-term damage.
While you can go to a snowboard repair shop when you need to wax your board, you can also do it yourself using a waxing iron, wax scraper, and buffing brush.
5. Storing Your Board Properly
One of the most important things to do with your board is to ensure that it’s stored in a safe and dry place when not in use.
Otherwise, you risk moisture seeping into cracks and crevices and destroying the board from within, potentially ruining the entire ride.
Ideally, you would store your board in a dry room during winter.
However, if you don’t have one available, a garage would work well for this purpose, or you could store the board inside.
Anywhere that’s room temperature and is sufficiently dry will work well to keep your board safe and dry.
Final Thoughts
Chips in snowboards can be repaired. You can either cheaply do it yourself with epoxy or go the pricier route and use a repair candle on the afflicted areas.
If you don’t feel like you have the skills to repair your boards, get a professional to fix it for you, but just remember that’ll come at a larger price.
It isn’t the end of the world to get a chip in your snowboard, and it can be swiftly repaired.