There comes a time as an experienced snowboarder when you’ll eventually be asked by a friend or family member to impart your knowledge and share your skills. Fortunately, there’s a way to teach a new student quickly and safely, so you don’t have to miss out on your own precious mountain plans.
To teach snowboarding to beginners, you’ll want to start with some snowboarding theory and indoor demonstrations. Then, by prescribing a few time-tested training techniques, your student will develop the skills needed to achieve the beginner snowboarder’s holy grail: linked turns without falling.
Today, we’ll cover some simple steps you can follow to build your student’s confidence and perfect their basic techniques. Combined with enough practice, these will have someone who’s never strapped on a snowboard before ready to learn intermediate skills in no time.
Step-By-Step Guide For Teaching A Beginner Snowboarder
For most new snowboarders, the goal is to comfortably make it down a beginner slope while linking their turns without crashing from catching an edge or losing balance.
By following this step-by-step guide, you should be able to teach any dedicated newcomer the skills necessary to achieve this after just a few days of practice.
1. Standing Up
The first skill any snowboarder needs to learn is being able to stand upright on their board without moving down the slope.
First, have them strap into their board and sit facing downhill. When ready, have them push off into a standing position while digging their heel edge into the snow.
If necessary, be ready to hold your student’s hands during the first few attempts while they find their balance. When they can stand still on their heel edge, it’s time to practice on the toe edge.
This time, have your student roll onto their front before standing up so they can dig their toe edge into the snow.
When teaching beginners, it’s always best to start with heelside exercises before toeside because using the toe edge requires facing uphill; most people get nervous when they can’t see what’s behind them.
If it makes your student more comfortable, offer to stand behind them when they’re practicing getting up onto their toe edge.
2. Heel Slide
Once your student can stand up and remain stationary on both edges, they’re ready to practice moving downhill.
The goal here is for them to keep their snowboard perpendicular to the fall line of the mountain throughout their descent.
This exercise familiarizes the rider with the amount of pressure they need to lift off their heels to start accelerating and the amount they need to apply to stop without falling over.
It’s also an excellent way for beginners to learn how their center of gravity affects their balance and how to maintain a stable posture.
It’s important to remind your student how edges can catch in the snow and that if they dig their toes into the slope, they will fall over.
3. Toe Slide
When your pupil has comfortably made their way down the slope by sliding on their heel edge without falling, it’s time to do the same on their toe edge.
As mentioned earlier, this is going to be a more challenging task for the majority of beginners.
It’s important to remain nearby to offer encouragement, and you’ll be able to ease your student’s nerves by letting them know the way behind them is clear or by warning of upcoming obstacles.
While toe-sliding, you’ll want to teach your student about bending their knees and keeping their back straight but, most importantly, about head movement.
At some point during a toe slide, likely sooner rather than later, most learners turn their head to look behind them; this is when they realize the body and board almost always follows the head.
Their board will begin to turn towards the fall line, and they’ll pick up speed, panic, and fall over.
If you teach your student this valuable information before they start, they should be able to avoid a few extra bruises.
4. Falling Leaf
After board slides come the ever-effective Falling Leaf technique, which is critical for teaching beginners about pressure control and steering their board.
It’s also a good way for any student to start feeling what it’s like to ride in the switch position. As before, they’ll start with the heelside before progressing to the toeside.
First, have your student pop up onto their heel edge in the basic stance.
Next, have them lift some pressure from the heel of their leading foot and slowly move their hips towards the nose of their snowboard while looking and pointing across the slope.
Once they’ve traversed across the slope, they’ll need to gently stop and do the same in reverse, shifting their weight to the tail of the board and looking and pointing back across the slope.
When your student can use Falling Leaf on both edges to descend the hill without falling, they’re ready for the last exercise before they attempt to link their turns.
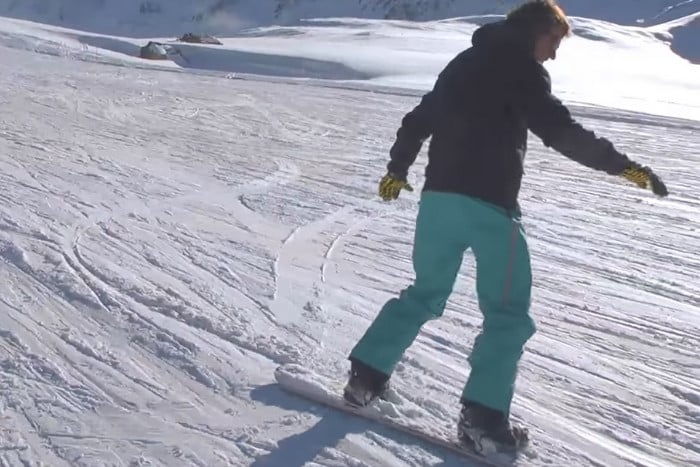
5. Garlands
Garlands differ from the Falling Leaf technique because the goal is to learn how to initiate and complete a turn without switching between edges.
After practicing these, your student should be more comfortable pointing their board down the fall line, riding on a flat base, turning out of the fall line, and coming to a safe stop.
Have your student start in a gentle heel slide and, when they’re ready, have them guide their snowboard down towards the fall line.
Before they pick up too much speed, they’ll need to tilt and pivot to lead their board across the slope, traversing in the same direction they started.
Instead of coming to a complete stop, instruct your student to repeat the technique until they’ve made their way across the entire slope.
Once a beginner can use heelside and toeside garlands to traverse back and forth across the mountain, they’re ready to start linking their turns and switching between edges.
6. Linked Turns
If your student can garland on both edges without any issues, linking turns shouldn’t prove much of a challenge as long as they maintain confidence.
Because switching from the heel edge to the toe edge is generally more of a challenge for beginners, for this last step, you’ll have them start by executing a toeside garland.
When their board starts following the fall line, the second half of the maneuver is the same as completing a heelside garland.
Now, your student should be able to drop towards the fall line again from their heel edge and switch to their toe edge, facing up the mountain.
If they can do this back and forth in an S-shape down the mountain, it’s time to pat them on the back – they’re linking their turns and ready to graduate to intermediate snowboarding techniques!
Top Tips For Teaching A Beginner Snowboarder
To finish up, we wanted to list a few key points to bear in mind that we’ve always found useful when it comes to teaching newcomers to the sport.
1. Start Indoors, Finish Outdoors
As eager as your student might be to get out onto the snow, start with some indoor theory.
Talk them through the anatomy of a snowboard and have them strap into their board so they can get familiar with the basic postures.
Watch some online videos of the techniques you’re going to teach them, and, most importantly, use cushions to demonstrate how to fall safely.
Crashing is inevitable but knowing how to fall is the best way to avoid injury.
2. Recommend The Right Gear
If you’re a veteran snowboarder, chances are your equipment is tailored to your experience level and specialized riding style.
Remember that a beginner will need a board that’s more forgiving and easier to turn, so a shorter than recommended base might be best.
A board with a softer flex level will also be easier to manipulate, especially at the slower speeds a newcomer will start out at.
In terms of board profile, some make it easier to catch an edge than others; a traditional camber or flat profile will likely be too catchy or aggressive, whereas a hybrid camber with camber underfoot and rocker tips is a perfect starter board.
A boot with softer flex will be less responsive than a stiffer one, which is actually a benefit to a beginner, and it’s important to take the time to ensure it’s the right fit.
Aside from affecting performance, uncomfortable boots are more likely to put a newcomer off the sport entirely if they think painful gear is the norm. Lastly, think about protective equipment.
We’d recommend wearing a helmet to riders of any ability, no matter their experience level, but newcomers are going to find themselves falling a lot more often when they inevitably catch an edge.
Wrist guards are a great option to protect from sprains or fractures when your student sticks their arms out after catching a toe edge, and impact shorts go a long way to minimize backside bruising from that caught heel edge.
3. Pick The Right Slope
Most resorts have nursery slopes but bear in mind the most important feature of a learning slope is space.
Anyone who’s been skiing or snowboarding before is familiar with how beginner boarders need to use the whole width of a run for practicing, so a wide slope with room for Falling Lead and garlands is a must.
You’ll also want to pick somewhere quiet where there’s less chance of an experienced skier or snowboarder getting in the way of your student’s training maneuvers and causing an accident.
If you’ve got a clear view of what’s coming down the mountain behind you and what’s coming up, it’s much easier to spot for your student, and they’ll feel more confident knowing what’s going on around them.

4. Ditch Your Board
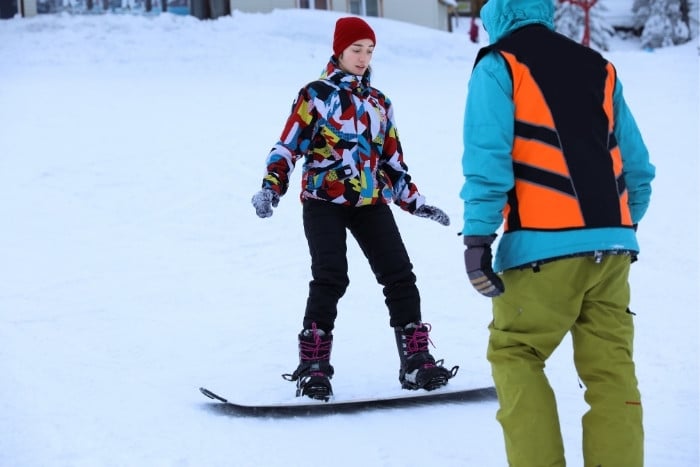
At least for the first few training stages, you will probably find the teaching process easier if the instructor isn’t strapped into their snowboard.
You’ll be in a much more stable position to steady your student when they first try standing up on their heel and toe edges, and you’ll be able to walk around them when they start board-sliding to assess their posture from every angle.
Of course, you’ll want to strap back in to demonstrate each new technique but feel free to take your board off whenever you feel it may benefit the learner.
5. Exaggerate Your Movements
As you perfected your snowboarding technique over the years, much of what you do will become natural through muscle memory, and your movements will have become far more efficient.
When you need to physically demonstrate a particular movement or motion on your own snowboard, if you ride as you normally would, your individual motions will be much harder to spot as you’ll have refined them over time.
To counter this effect, you’ll need to over-exaggerate every movement and possibly incorporate a few extra techniques you ditched as you became more proficient.
It will feel a bit strange, but, for example, if you’re demonstrating how to put weight on the front foot, you’ll need to lean into it more than usual and reach out with your front hand; this technique helps beginners distribute their weight properly.
If you’re bending your knees, bend them more than you normally would, and show your student how they can swing their back hand around when turning to give themselves enough momentum.
Over time, most beginners will begin to drop the unnecessary motions, and their body movements will become more subtle and efficient as they progress as a snowboarder.
6. Be Patient
Spending your precious mountain time helping someone else get to grips with snowboarding can be stressful, especially if you’ve got limited time on your snow holiday and the weather conditions are particularly good.
Furthermore, you might have a student who’s a complete natural and linking turns within an afternoon, or you may be teaching someone who can barely stand up after a day of practice.
At the end of the day, instructing as a professional or an amateur takes a lot of patience and understanding. It helps to remember how you started out.
Think about who took the time to teach you and how grateful you are that they did.
Even if you paid for lessons with a specialist snowboard instructor, there’s a good chance your more experienced buddies had to hang around on your first rides together.
We’ve all spent the day catching edges or having to foot-push along flat sections after losing momentum on our first mountain sessions.
7. Know Your Own Limits
Lastly, it’s important to understand that coaching isn’t for everyone, and that’s ok.
Even if you’re a superstar instructor, you may be working with a friend, family member, or romantic partner, which can be a more challenging student-teacher dynamic than if it were a complete stranger.
The main thing to remember is that if it’s in the student’s best interests, there’s no harm in recognizing your limits and recommending they switch learning environments.
They may be much better off learning in a group scenario with other beginners or being coached one-on-one by someone they don’t know.
Conclusion
Hopefully, this guide has shown that with time, patience, and the right progression of training techniques, teaching snowboarding to beginners isn’t as daunting as it might seem.
Within no time, your mountain protegee will develop the skills and confidence to keep up with you on the slopes so you can spend less time coaching and more time riding your favorite lines.