Dings, scrapes, and chips are all a part of snowboarding; however, some are more serious than others. While some damage may be purely cosmetic, some may end up leading to more serious issues down the line. It’s always worth knowing how to identify these, as well as how to repair them yourself at home.
Fixing a snowboard topsheet chip is a relatively quick and straightforward job and can be done at home with simple tools and cheap materials. A 2-part epoxy resin can be used to repair and seal the chip if you clamp the area down while the resin cures overnight. Afterward, you can use fine sandpaper to remove excess resin from your board.
Before we jump into how to repair your snowboard, let’s look at how to identify a topsheet chip and why it’s a good idea to fix one as soon as possible.
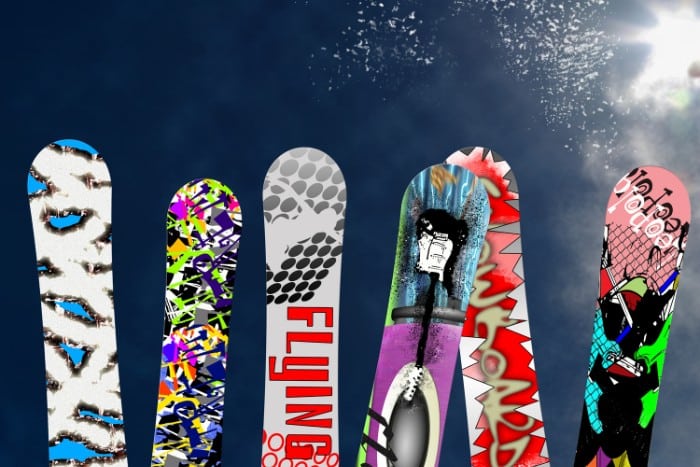
Topsheet Chip Basics & Repair
The topsheet of a snowboard is the upper section of the board, situated above the wooden core.
A topsheet can be made from various materials, including wood, nylon, aluminum, fiberglass, polyurethane, or a composite of different materials.
The choice of material usually reflects specific properties the manufacturer wants the board to have.
For example, using fiberglass over wood will result in a lighter board, and aluminum can be used to increase stiffness.
Whichever materials are used, the outermost layer will be a waterproof lacquer of some description. The topsheet of a snowboard is important because, like the base, it protects the core of the board.
A chip to the topsheet most often occurs around the edges of the snowboard, usually due to the board colliding with a hard or sharp surface while out riding or if the board falls over after being stored incorrectly.
Sometimes, topsheet chips appear as small dents in the edge of the topsheet; however, they usually refer to a section of the topsheet that’s cracked and is peeling away from the core of the board.
If a raised crack appears across the topsheet of your snowboard, there’s a good chance that this isn’t surface damage, and it may, in fact, be a crack in the core of the board.
In this case, you may want to take it to a professional repair shop for assessment, as riding a cracked board may cause it to snap while riding, which is extremely dangerous.
Why Should You Repair Chips In Your Snowboard’s Topsheet?
It’s worth noting that some topsheet chips are purely cosmetic and whether you repair them or not is down to personal preference.
If a chip is small, you can use transparent nail polish or superglue to cover it and gently sand the residue down after it sets.
However, if the chip is significant in size or the topsheet is peeling away from the board, it’s important that you repair it as soon as possible.
Why? Because if the chip is severe enough, the core of your snowboard is exposed to the elements, and the chip will get worse over time and become harder to fix.
Snowboarding is a cold and wet sport, so water will eventually seep into your board’s core. This is bad news as it can rot and degrade the wood inside.
Add subzero temperatures to the mix; this water will freeze and expand, causing even more damage to the core’s integrity.
Fortunately, with the right tools, fixing a chip in your snowboard’s topsheet is one of the easier repair jobs you can do yourself at home.
Step-By-Step Guide To Fixing A Snowboard Topsheet Chip
1. What You’ll Need
- Paper towels
- Windex (or similar glass cleaner)
- Two-part epoxy resin
- Piece of cardboard
- Stirring stick
- A pair of nitrile gloves
- Razor blade or box cutter
- Packing tape
- A section of a plastic bag
- 2 short pieces of ¼” thick wood
- 2 C-clamps
- 120 grit sandpaper
Step 1
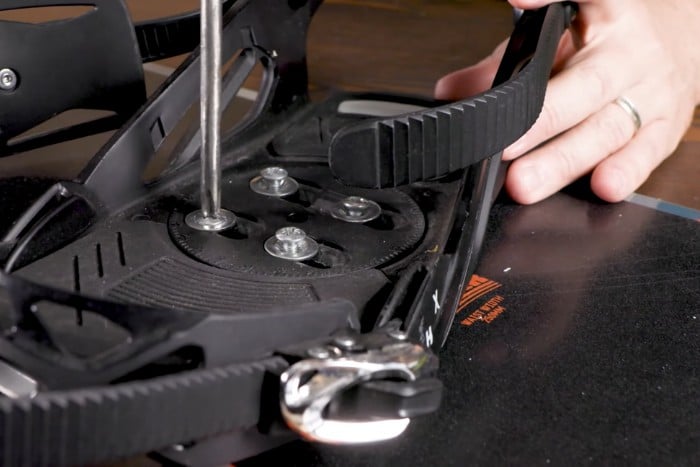
You’ll want to start by removing your snowboard bindings to give yourself room to work and placing your board on a clear, flat surface with plenty of space.
In case while reassembling you get confused between which binding goes where, we have an article on identifying which snowboard binding is left and which is right.
Step 2
Next, using the glass cleaner and paper towels, give the board a thorough clean, paying extra attention to the area surrounding the chip while being careful not to get chemicals in the chip itself.
Step 3
Make sure there’s no dirt or debris inside the chip or under the section of the topsheet that’s peeling up. You can use a razor blade or box cutter to dig out any dirt and cut away any loose fibers within the chip.
Step 4
Now, you’ll want to box off the area surrounding the chip with packing tape to protect it from the resin. Tear or cut off small strips of tape and try to get as close to the chip as you can.
It’s also a good idea to tape off the adjacent edge and sidewall of the board to save yourself from having to remove excess resin later.
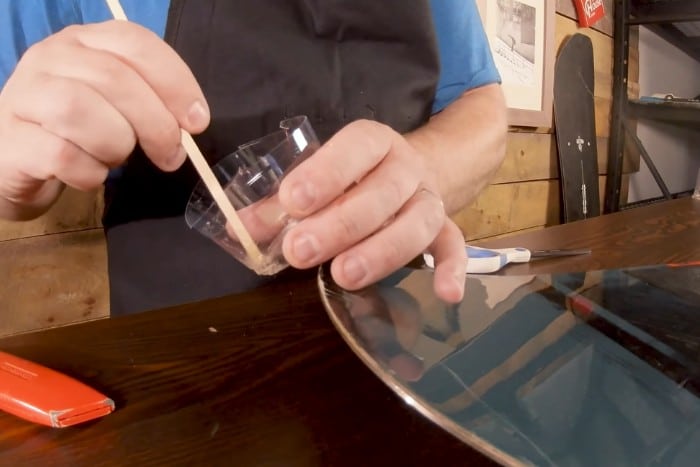
Step 5
Now it’s time to mix the resin. Before you start, make sure you put on your protective gloves. Latex gloves are better than nothing, but nitrile gloves provide better resistance to hazardous chemicals.
Add the correct ratio of resin and hardener to your piece of cardboard (as per the instructions, different products sometimes require different ratios) and combine the two with your wooden stirring stick.
Step 6
To apply the mixed resin to the chip, you can use the stirring stick to push the mixture into the gap underneath the topsheet.
Depending on the severity of the chip, you may need to push the resin deeper to create a sufficient seal.
For this, you can use the thin razor blade or box cutter to spread the compound in those hard-to-reach spots.
Step 7
Once you’ve used enough resin in the damaged area, you can press down on top of the chipped area of the topsheet and out towards the edge of the board using a piece of plastic bag to force out the excess, using a piece of paper towel to remove the mixture.
This also helps start the bonding process and pushes the resin into every part of the chip.
Once you’ve taken care of the inside of the chip, you might also want to spread a thin layer of resin on the topsides of the cracks for an even tighter seal.
Step 8
Now the resin is in place, it’s time to secure the chipped section so it can set properly.
For this, you’ll want to place a thin wooden block on either side of the chipped section of your snowboard before clamping them into place with your two C-clamps.
To prevent the wood from sticking to your snowboard, either use your piece of plastic as a protective barrier or cover your wooden blocks in packing tape.
Step 9
Once your clamps are in place, it’s time to wait.
Make sure you follow the instructions regarding the resin’s cure time; even with quick-drying resins, it’s worth waiting a minimum of 24 hours to ensure the best results.
Step 10
Once your resin’s cured, you can remove the clamps and wooden blocks.
Using your fine sandpaper, gently sand down the excess resin on the topsheet, edge, and sidewall of your snowboard until it’s smooth.
Conclusion
And that’s it! You’ve successfully repaired the chip in your snowboard’s topsheet.
It may not look brand new, but board battle scars are just part of the sport, and it’s a small price to pay for having to replace the whole thing.