The fundamentals of repairing the sole of a snowboard boot aren’t dissimilar to repairing any other type of boot or shoe, although the risks posed by a failed repair job are greater when you’re out on the slopes.
Fortunately, fixing the sole of your snowboard boot can be a straightforward process with the right tools, attention to detail, and a little bit of patience. Choosing the correct adhesive for the job is key, and you’ll need some protective gear to repair your boot safely.
Below, we’ll cover the simplest, safest, and most budget-friendly way to fix your snowboarding boot sole so you can get back on the mountain in no time.
Repairing a Snowboard Boot Sole
These tips are tried and tested and guaranteed to work if you follow them to the letter.
Before we get started, consult your local snowboard supplier or rental shop for advice if you’re not confident that you can self-repair your boot without causing further damage.
1. Which Adhesive?
The first thing you’ll need to decide is which adhesive to use to secure the sole back into place, and there are a few factors to consider.
Remember, snowboard boots are waterproof and must remain that way after any repairs.
The adhesive you choose should also allow for a level of flexibility once it’s dry; otherwise, the sole is likely to come loose again after the boot sees some action.
Lastly, you’ll need to bear in mind that snowboard boots only tend to be worn in cold conditions, and some adhesives start to fail in extreme hot or cold temperatures.
For these reasons, we don’t recommend using regular superglue unless you’re repairing very minor damage, and it’s all you have available.
Urethane adhesives are one of the best solutions for repairing extensive damage as they cover all of the bases listed above: they offer flexibility once they’ve cured, can withstand sub-zero temperatures, and are completely waterproof.
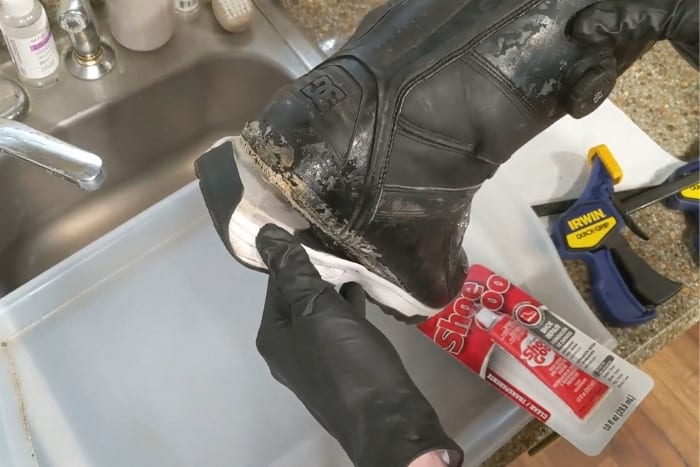
Alternatively, products like Shoe Goo are formulated specifically for shoe repair.
They are versatile enough that they can also be used to seal minor tears in the outer layer of your snowboard boot or even fix fraying laces.
2. Safety First
Heavy-duty adhesives can be hazardous to your health when not used correctly, so start by ensuring you read and follow all the instructions on the product label.
Next, you’ll need to make sure you have the correct PPE (Personal Protective Equipment) at hand.
Gloves are a must; aside from the stickiness issue, most adhesives will also cause some level of skin irritation and have the potential to leave nasty chemical burns.
While latex gloves are commonly available, they rarely provide enough protection to prevent the chemicals from the adhesives from leaching through.
Nitrile gloves will provide the necessary protection, although they’re less stretchy than latex options so make sure you choose the right size.
Adhesives also give off toxic fumes, and while a face mask or respirator may be overkill (although we’d use one if it was available), you should always work in a well-ventilated area with lots of space.
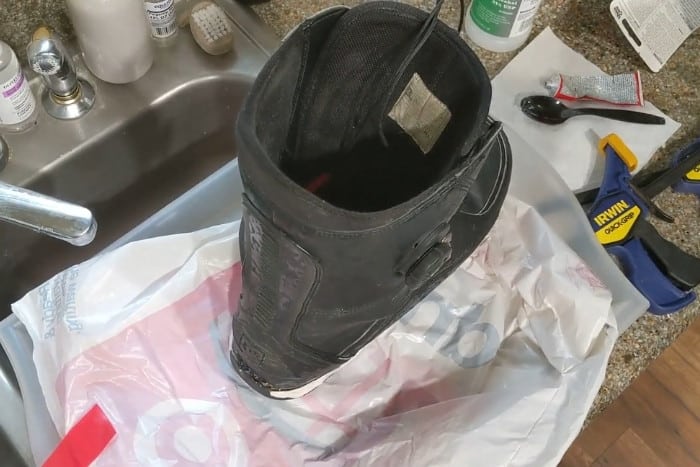
When you’re ready, clear yourself a decent-sized work area and lay down newspaper or an empty trash bag to prevent damage to any surfaces.
3. Clean Your Sole
Before you apply your adhesive, you’ll need to remove the remnants of the old glue, or you’ll compromise the integrity of the new seal.
For this job, you’ll want to use a solvent such as isopropyl alcohol or acetone.
Acetone is the more effective of the two at dissolving adhesives; however, it can also dissolve other materials, including parts of the boot you don’t want to be dissolved.
If you’re unsure whether the sole of your boot or the base of its shell will hold up against acetone, you can always apply a small test drop first and see what happens.
Whichever solvent you use, you’ll need to follow the same safety guidance listed above: read the label, wear nitrile gloves, and make sure you have enough ventilation.
Apply the solvent to the old glue with a Q-Tip until you feel it start to soften, then use a damp cloth to clean the area.
When the inner surfaces are dry, take a piece of medium-coarse sandpaper and gently rub it around the inside areas of the rubber sole you’re trying to reattach.
Lightly sanding the rubber will increase the surface area of the material you’re gluing so the adhesive can form an even tighter bond and further reduce the risk of it coming loose again.
4. Apply the Adhesive
Now, you’re ready to apply your adhesive.
The exact method will vary as some adhesives work by mixing two separate fluids together, while others require letting the glue cure for a short time before bringing the two surfaces into contact.
In the case of the latter, remember that you’ll need to figure out a way to wedge the sole away from the bottom of the boot if it’s still partially attached.
To apply the adhesive, you can use something as simple as a plastic glue spreader to get a thin, even layer of glue on every part of the surface.
The advantage of using a thin spreader with a tapered edge is that if the sole is still partially attached, you can reach into the tight crevices to ensure you get a complete seal.
5. Bind the Boot
For the adhesive to do its job, you’ll need to make sure the glued surfaces remain tightly secured throughout the curing period, and there are a few ways to achieve this.
Our preferred method is to use multiple rubber bands around the boot and sole to hold everything in place.
If you find this isn’t doing the trick, you can also tightly wrap the boot in duct tape, although this method is a bit messier and can leave behind a sticky tape residue that you’ll need to remove with your solvent.
In a pinch, you can also position the boot with the sole upwards on a stand and place weights on the sole to hold it in position.
6. The Waiting Game
The final, critical step in repairing a snowboard boot’s sole is ensuring you leave enough time for the adhesive to set properly.
As tempting as it can be to get back on your board as soon as possible, if you try and use the boot before the glue has cured, the sole will detach again, and you’ll have to start the entire process from scratch.
Different adhesives have different curing times, but to play things safe, leave at least twenty-four hours for the glue to set in a cool, dry location.
Because your snowboard boot must remain 100% waterproof, once the first adhesive is dry, we recommend creating a more robust seal by applying a thin layer all the way around the boot where the edge of the sole meets the shell.
This may mean waiting another day until you’re ready to ride, but it’s worth it if it means keeping your foot dry and preventing further damage.
Conclusion
As you’ve now seen, fixing the sole of your snowboard boot isn’t as daunting a task as you might’ve previously thought. Like with any DIY project, preparation and patience are the key ingredients.
If the damage to your boot is too extreme, you may find yourself needing to turn it into a specialist repair shop or even shopping for a replacement pair, but there’s little harm in attempting to fix the issue yourself first.